Free Download C Compiler for Mac Os X Updated
Free Download C Compiler for Mac Os X
This document outlines the process of installing Apple tree'south command line programmer tools (which provide a C compiler) and Microsoft's Visual Studio Code (which is an excellent and free code editor). If y'all would rather use a different surround, Apple's Xcode is some other good option.
Installing the command line tools
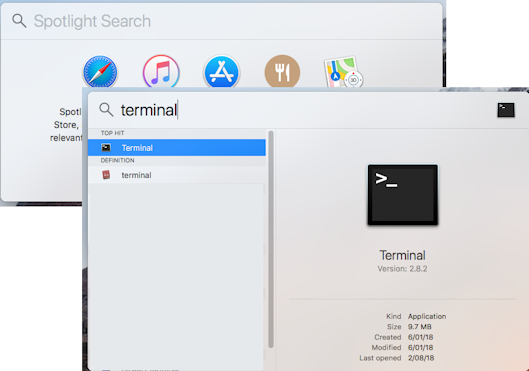
The first thing to do is to check if yous already take the command line tools installed. To cheque if you take them, get-go by opening a Terminal window. You tin find the Final application from inside the "Utilities" folder within the "Applications" binder. Or, simply search for "Terminal" as shown beneath:
The Terminal window provides you with a command line prompt - you lot can type commands at the prompt to conduct out tasks. The screenshot below shows a newly opened Final window:

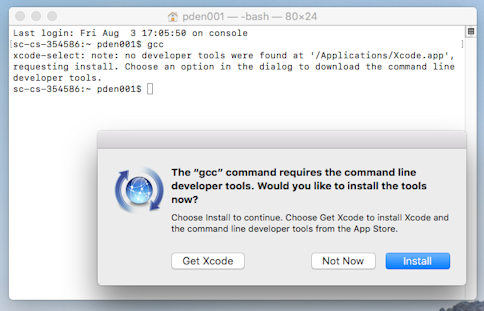
Enter the control "gcc" at the prompt. If you have the command line tools installed already, you will run into some text output in the window. If yous practise not have the command line tools installed already, y'all will see a dialog battle asking you lot to install them. An example of this is shown below:
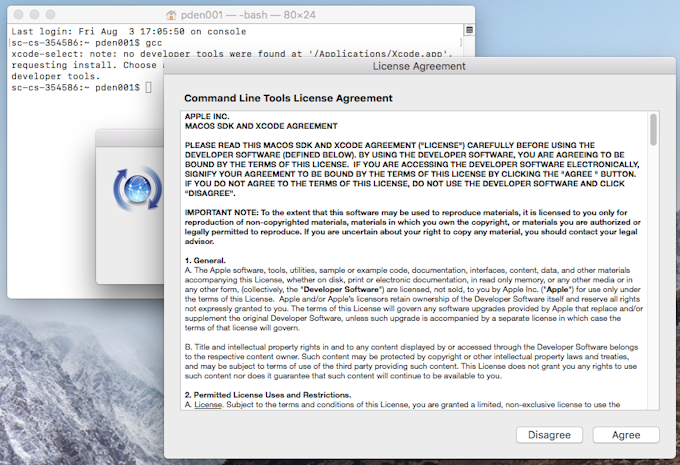
If y'all need to install the command line tools, click the "Install" button. You will need to "Concord" the license agreement terms as shown below:
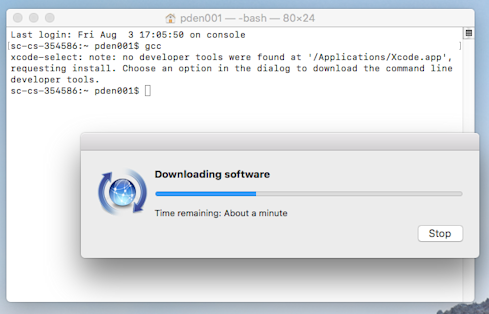
It will take a little time to download and install the tools... but be patient!
Once the tools are installed, you volition be shown a confirmation message.

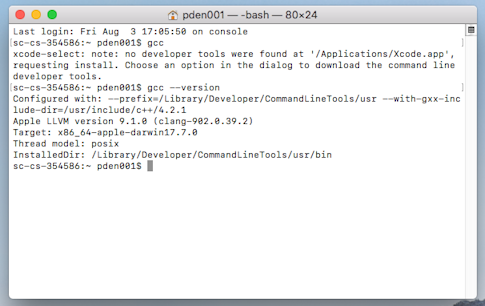
The name of the C compiler (that was installed along with the command line tools) is gcc. To check that this is now successfully installed, enter "gcc --version" at the prompt. You should see a few lines of output, showing the version information, as shown below:
From the Terminal window, you can view which directory is electric current by typing:
- pwd
You can change directories past typing:
- cd .. (to move up one level in the directory tree) or
- cd DIR_NAME (to move down i level into the directory named "DIR_NAME")
You can list all of the files in the current directory by typing:
- ls
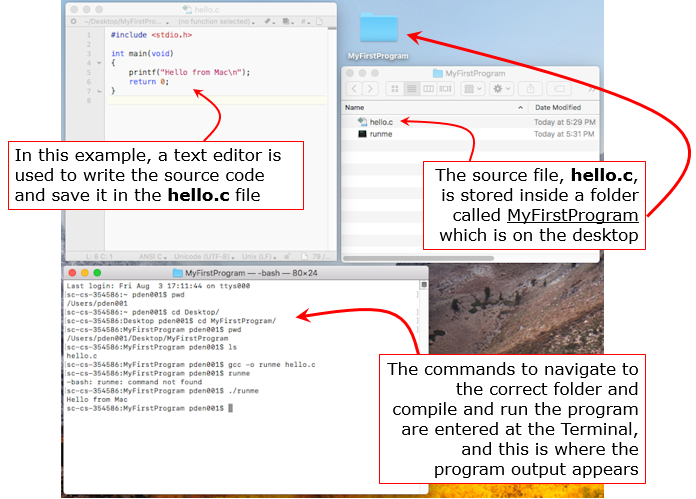
And finally, y'all can compile your source file with the command:
- gcc -o runme hello.c
In this case, "runme" is the proper name of the executable file that will exist created if your code compiles successfully, and "hullo.c" is the name of the source file. In the screenshot beneath, you can see that a new file called "runme" was created in the same directory equally the source file.
To run the executable, you must type:
- ./runme
which means: "execute the program named "runme" which is the current directory
OK, let's go ahead and compile our first very simple C plan using the gcc compiler. Nosotros will use a basic text editor to write the source code, and the commands for compiling and running the program are illustrated beneath:
Installing Visual Studio Code
Now that we accept installed the command line tools, let's install a powerful (and free) code editor chosen Visual Studio Code. We volition use this editor to write the source code for our programs. In improver, Visual Studio Code has an "Integrated Final" characteristic which means we can compile and run our program without leaving the Visual Studio Code surround.
Once the download is complete, you can admission the "Visual Studio Code" awarding from the Downloads binder:
Information technology might be a adept thought to motion Visual Studio Code from the Downloads folder to the Applications folder then that it is more convenient to admission in the future:
Now, install the "C/C++ extension" by click on the "Tools and languages" link nether the "Customize" menu:
Choose the "C/C++ for Visual Studio Code" extension and click "Install". If yous can't see the list of extensions as shown below, brand certain the search box ends in "category:languages c":
Now, let's create a C program using Visual Studio Code. In this example, we have a binder called MyFirstProgram on the desktop, equally shown below. We will create a new C source file (in the Visual Studio Code editor) and save it in this folder.
Type the source code for a simple C programme into the new file. In this example, the program will but impress a short message. And then, save the file as "howdy.c" into the MyFirstProgram binder:
In the screenshot below, you tin can encounter that the "hello.c" file is saved in the "MyFirstProgram" folder, and the Visual Studio Code editor is showing the contents of the source file.
In order to run the programme, we first need to compile it. We will employ the "Integrated Terminal" feature of Visual Studio Code (Annotation: this might simply be chosen "Concluding" in your version of Visual Studio Lawmaking). Select this from the "View" bill of fare.
The integrated terminal pane will appear within the Visual Studio Code surroundings. In the screenshot below, the terminal pane appears underneath the source code. You can blazon the same commands in this integrated terminal equally you lot can type from the regular Terminal window - equally shown, the source file has been compiled and executed. The output appears directly in the terminal pane.
To brand changes to the program, you tin can edit the source lawmaking, save the changes, and compile and run the source code again.
Free Download C Compiler for Mac Os X
Posted by: andersonheye1936.blogspot.com

